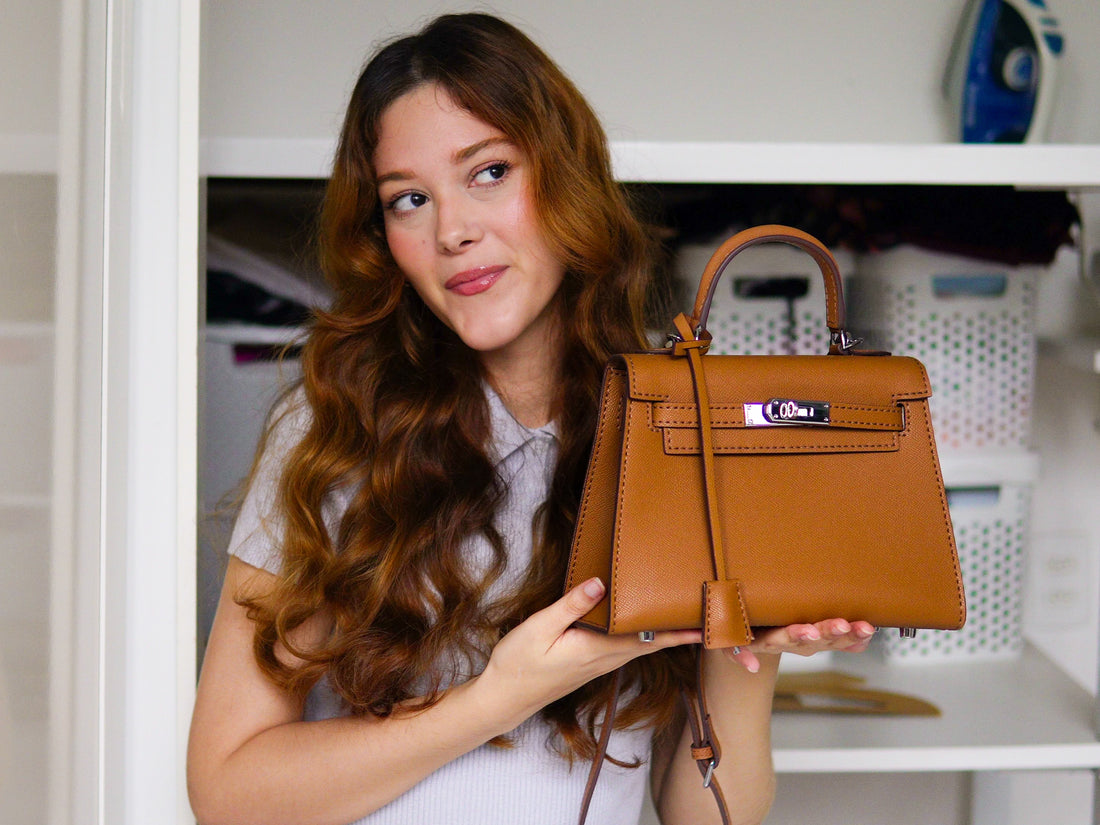
There’s something truly special about wearing something you’ve made yourself— I believe most of you can understand what I mean. Recently, I managed to successfully make something I never thought I would: I hand sewed a leather bag! Totally. By. Hand. The design is inspired by the iconic Hermès Kelly Bag, and the end result was so much better than what I expected!
For the materials, I used a pre-cut leather kit I received from Babylon Leather, and even though I had (almost) zero hand-sewing experience, I was able to take this challenge. If you want to watch the sewing process in video form, you can go to my latest YouTube video. But here I’ll share my overall thoughts about the project, and I’ll also review the Bag Kit and the experience.
The Leather Bag Kit
Ever since finishing the bag, I have received a lot of compliments. I wore it three times while going out during this past weekend, and since I’m only human, rs, I have made sure to mention to my friends and family that the bag I was wearing was actually handsewn by me (and that if they wanted to watch me make it, they could head to my YouTube channel haha).

The response was almost the same every time: everyone looked shocked and reeeeally impressed. They couldn’t believe I actually made it. I mean, they are used to seeing me wearing my own creations, but this leather bag truly looks like it came straight from a store! And that’s when I had to be honest and explain that the materials I got really played a big part in this.
The leather kit I received from Babylon Leather made this project more approachable and professional looking in the end. The leather pieces came pre-cut with the edges already finished and had evenly spaced pinholes. All I had to do was hand stitch the pieces to put it together!

Not to downplay the work and effort I put into it… in the end I spent over 9 hours making it! But it was different from any other project I’ve made before, and also a bit more simple. I didn’t need to break my head trying to calculate the proportions for a pattern, cut the pattern pieces myself and envision the order of all the sewing steps in my head. Each one of those things were already done for me, and I do think it played a big part in the end result looking so polished and professional.
 And to top it all off, basically everything I needed for the project was included in the kit: needles, thread, clips, scissors, and even finger grips to help manage the thicker materials. The only thing I needed to use that didn’t come with the kit was a match (or lighter) to melt the threads in the end. But I believe flammable materials would make it more challenging for them to ship the packages worldwide, so it makes sense that it wasn’t included.
The stitching method was simple but required patience. It did look a bit challenging at first, but I was able to get used to it pretty quickly. The repetitive nature of the stitching turned out to be therapeutic, especially because I had an audiobook playing in the background almost the entire time. Over four days (a total of 9 hours and 27 minutes of work!) I learned to appreciate the process.
Some parts of the bag were easier to sew, like single-layer sections or the pocket panel, because the material was a bit thinner. But stitching thicker parts, like the bottom of the bag and the handle, was a bit more challenging. Using the included clips and finger grips eventually made handling the materials much more manageable, but I did break a needle once and my fingers cramped a bit. Totally worth it, though.
Lessons Learned
Here are a few takeaways from my hand-sewing journey:
- Follow the instructions as they said: The video tutorial accompanying the kit laid out the steps from easy to more complex. I didn’t follow the order at first, which made some steps in the beginning a bit more difficult to get the hang of. So if you’re planning on making it yourself, I’d say you should follow the steps in the order they laid out.
- How to make the stitches look good: In the beginning I was afraid my stitching would look uneven. After a while I realised that I would need to pull the threads constantly so they wouldn't get loose. That worked really well!
- Use the tools they provided: The clip and finger grips are there for a reason—even though I didn’t think about it or use them in the beginning. Later, they saved me from sore fingers. The clip was especially helpful when sewing the side panels of the bag!
- Patience really pays off: Hand sewing takes time, but the end result was sooo worth it!
The Finished Product

The finished bag exceeded my expectations. The caramel leather and even stitching gave it a professional look, and the sturdy construction means it will (hopefully) last for years. I really love how it looks and I would totally do it again. I enjoyed the process way more than I thought I would.
Is It Beginner-Friendly?

Surprisingly, yes! I tend to think that if I can make something, then anyone can! But with the pre-cut materials and the instructions, I really think even those without sewing experience could take on this project. It’s really different from sewing something using a sewing machine. I think it requires less attention and less skill to handle the pieces. However, it does require a lot of time and patience! If you enjoy meditative, slow-paced projects, I think this is perfect for you.
If this sounds like your kind of project, you can try it yourself with one of Babylon Leather’s kits. They offer a lot of different designs and colors, so if the Kelly Bag isn’t really your style, you can totally find something else that will match.
The video I made and this post are not sponsored, I only received the kit as a gift to make it and share my honest thoughts with all of you. But they were kind enough to give me a coupon code (it’s “Coraline5”), so if you do want to make a leather bag for yourself, you can get a discount off your purchase, while also supporting my channel, because I’ll get a small commission off the sale!
Here's the link to their website: https://www.babylonleather.com
Overall, the making of this Kelly Bag was a really satisfying experience. Not only did I make a beautiful bag I have wanted for a long time, but I also proved to myself that I could take on something new with the hand sewing. So I encourage anyone looking for a rewarding project to give it a try—I think you won’t regret it!
With love,
Caroline

Captured: the moment a giant bug decided to attack me (read as: only slightly touch my arm)

